Community vs. Individual Supplies?
Believe it or not, back-to-school is right around the corner! Some teachers are already in their classrooms making preparations for the first day. During this time there are many different things to think about… and one of the topics up high on the list is classroom organization! It’s no secret that a well-organized classroom can help make each day run smoothly. One aspect of classroom organization that we see many teachers discuss is group vs. individual supplies. Should the entire class use supplies from a designated area? Should groups of students share a set of supplies? Or should individual students have their own supplies? We’ve compiled a few of our favorite examples of each. Perhaps you’ll find some inspiration for your own classroom. :)

This teacher has her students’ desks in groups, and each group has a supplies caddy that they share. However, each student has their own set of crayons. This would help to eliminate any problems with students not having the colors they need available, especially if there were specific instances where a particular color needed to be used.

In this setup, each student has their own supplies station within the group storage area away from their desk. Every student has a caddy where they keep their class books, a shelf for smaller items or current work, and a box for pencils, crayons, glue sticks, scissors, etc. This would be a great option if you utilize flexible seating options in your classroom!

This teacher also utilizes a group supplies container, but has gone a step further to arrange the desks around a plastic drawer set. Each drawer contains a different type of tool. Since the container stays in one place, it eliminates the possibility of any student feeling like they are “too far” away from the supplies bucket. It is also neat and out of the way, which provides maximum use of the desk workspace.

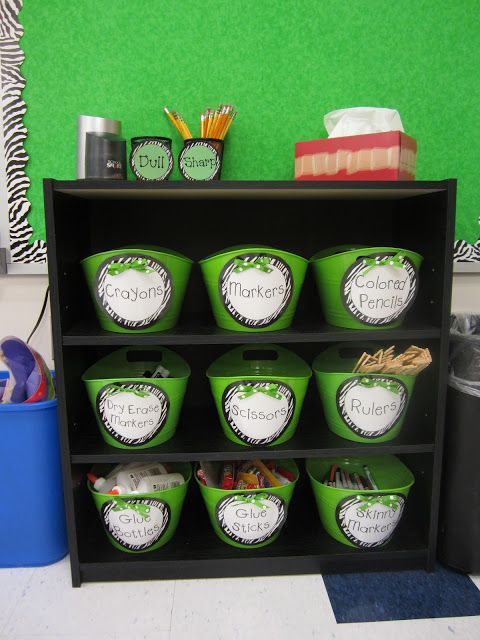
This teacher has also chosen to utilize a community supplies space, but all students share supplies from the same baskets. Each basket is clearly marked to distinguish the tool inside, and there is a container for sharp and dull pencils on top of the shelf.

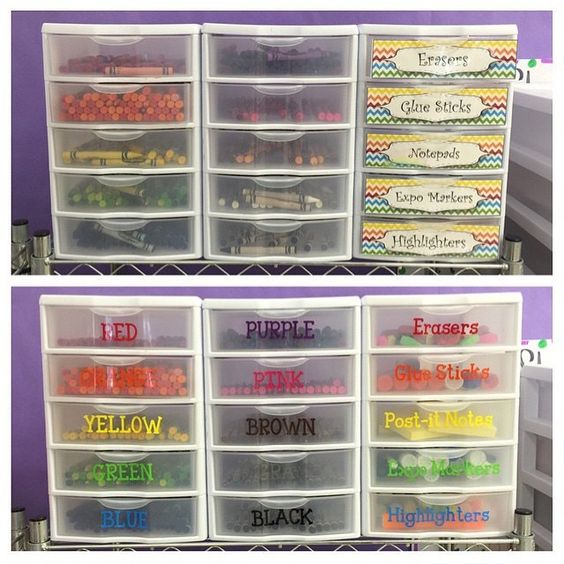
This teacher utilizes community sharing of supplies where each drawer is labeled with a specific tool. However, she also takes it a step further by color coding her crayon/marker drawers by color!

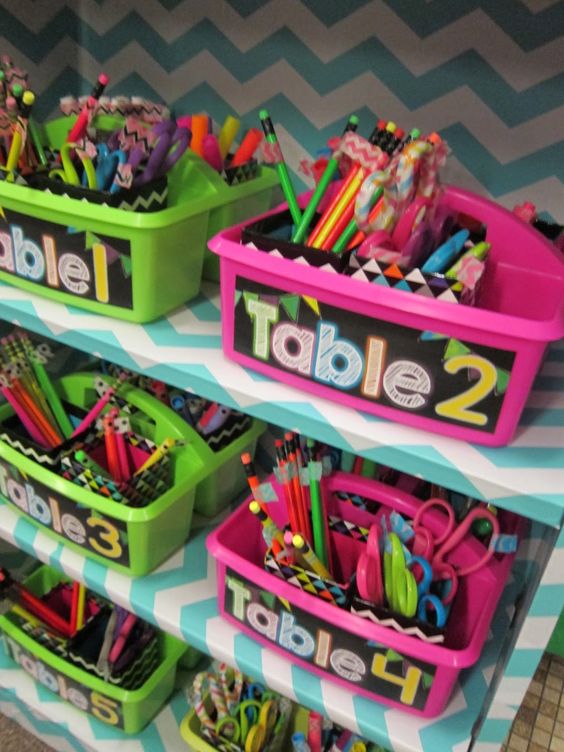
This teacher provides a supplies caddy for each table group in the classroom, but instead of having them at the groups at all times they have a “home” on another shelf in the classroom. This can be helpful for times when you do not want students to have supplies that may cause a distraction during a specific lesson. It also allows more free work space on the desks for various projects.
These are only a few of our favorite examples that we’ve come across, but there are SO many other variations! What works for one teacher (or even one set of students!) may not work for another. Don’t be afraid to make a change if something isn’t working in your classroom! Experiment and find out which organization style works best for you and your students!
We’d love to hear from YOU with what you think about the examples above, and also insight into how you organize your classroom supplies.


